Your computer or device relies on several systems to keep your internet browsing smooth—and one vital system is the Domain Name System (DNS). Sometimes though, your DNS records can get outdated or corrupted, causing issues such as slow browsing speeds, loading errors, or even difficulties accessing certain websites. That’s where flushing your DNS cache comes in.
If you’ve heard about DNS flushing but aren’t entirely sure what it is, why it matters, or how to do it on your Mac or PC, don’t worry. This guide will break it down for you, step by step, in simple terms that even non-tech-savvy users can understand. Additionally, we’ll cover what to do if flushing your DNS doesn’t work as expected. By the end, you’ll be equipped to troubleshoot common DNS-related issues effortlessly.

What Is DNS and Why Is It Important?
Before jumping into flushing the DNS cache, it’s essential to understand what DNS is and why it plays such a crucial role in your internet experience.
DNS Explained
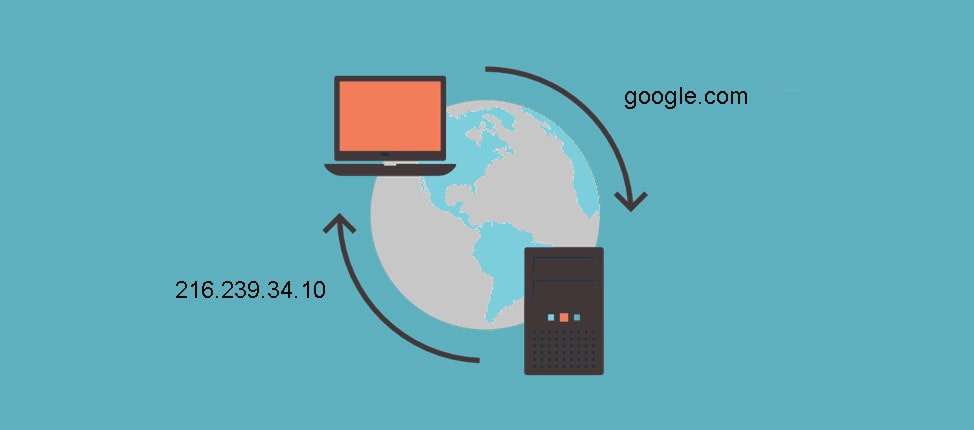
DNS, short for Domain Name System, is often referred to as the “phone book of the internet.” Whenever you type a website’s address (like yzzy.agency) into your browser, DNS translates that user-friendly domain name into the numerical IP address that your computer needs to locate the website. This process happens almost instantly.
Without DNS, you’d have to memorize numerical IP addresses for every website you want to visit—a nearly impossible task in today’s web-heavy world. DNS makes browsing seamless and user-friendly.
What Is the DNS Cache?
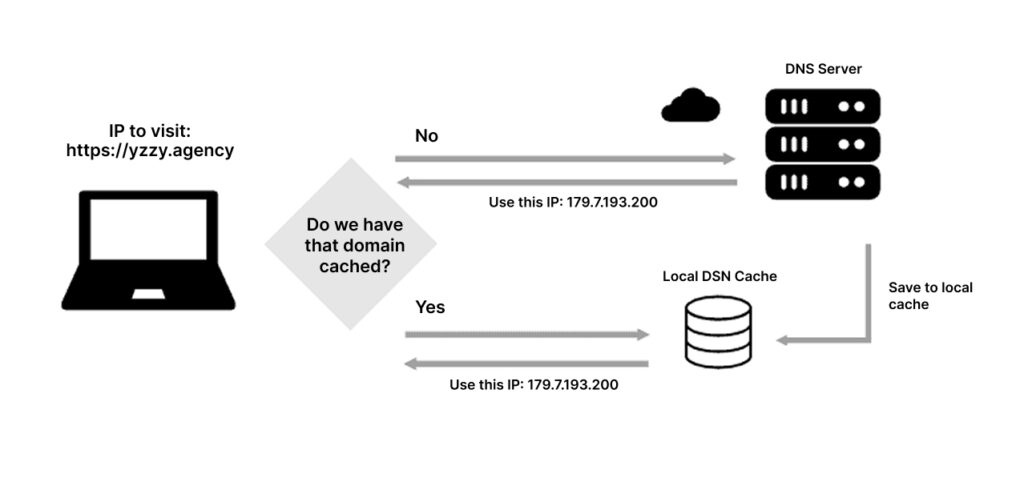
To speed up future visits to websites, your operating system temporarily stores DNS information—mapping domain names to IP addresses—in what’s called the DNS cache. For example, if you visited google.com recently, your computer won’t run a new DNS lookup the next time you visit; it will simply use the cached information.
While this cache makes browsing faster, it can occasionally cause problems.
Why Should You Flush DNS?
Flushing the DNS cache clears out all stored data, forcing your system to retrieve fresh DNS information. This can resolve several issues, such as:
1. Accessing Websites After DNS Changes – If a website recently changed its hosting, your cached DNS data may still point to the old IP address.
2. Fixing Connection Errors – Corrupted or outdated cache can prevent websites from loading.
3. Improving Performance During Connectivity Issues – Clearing the cache can refresh your network settings and improve browsing speed and responsiveness.
4. Resolving Privacy Concerns – Since DNS logs your internet traffic, flushing it can help remove traces of your browsing history.
Now that we know why flushing your DNS is essential, let’s look at how to do it step by step for both Mac and PC.
How to Flush DNS on a Mac
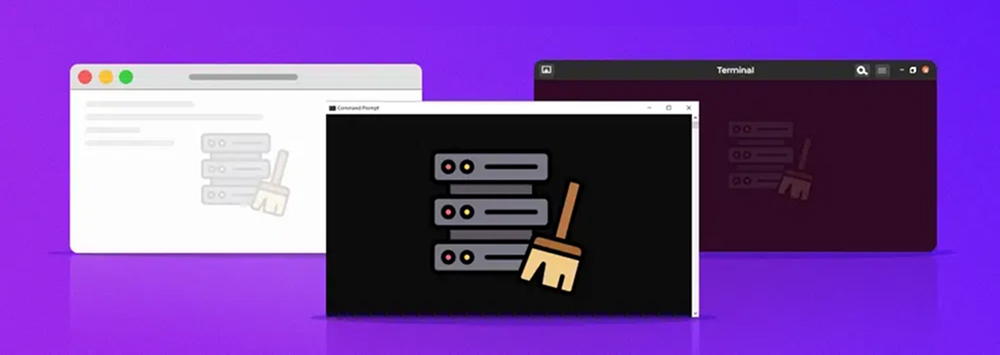
Mac users have a simple but slightly technical process to follow when flushing the DNS cache. Don’t worry—if you follow the steps below closely, it’s easier than it seems.
Steps to Flush DNS on macOS:
1. Open Terminal
Terminal is where the DNS flushing process happens. To open it:
Terminal is where the DNS flushing process happens. To open it:
– Use the macOS Spotlight search (press Command + Space).
– Type Terminal.
– Press Enter.

2. Determine Your macOS Version
Depending on your macOS version, the exact terminal command to flush DNS may vary slightly. Here’s how to check your macOS version:
– Go to the Apple menu () and select About This Mac.
– Note the version number.

3. Run the Flush DNS Command
Type one of the following commands based on your macOS version, then press Enter:
– macOS Ventura, Monterey, Big Sur, Catalina, and Mojave
sudo killall -HUP mDNSResponder
– macOS Sierra and High Sierra
sudo killall -HUP mDNSResponder
– Older Versions (e.g., El Capitan or Yosemite)
dscacheutil -flushcache

4. Authenticate with Your Admin Password
You’ll be prompted to enter your admin password. Type it, and press Enter. Note that you won’t see the password characters appear while typing—it’s normal and designed for security.

5. Restart Your Browser (Optional)
For the changes to fully take effect, close and reopen your web browser. You should now start experiencing a refreshed browsing session.
Pro Tip for Mac Users
If you frequently encounter DNS issues, it might help to use Google Public DNS settings (8.8.8.8 and 8.8.4.4) or your preferred DNS service instead of the default.
How to Flush DNS on a PC (Windows)
Flushing DNS on a Windows computer is straightforward and doesn’t require advanced technical knowledge. Just follow these steps:
Steps to Flush DNS on Windows 10/11
1. Open Command Prompt
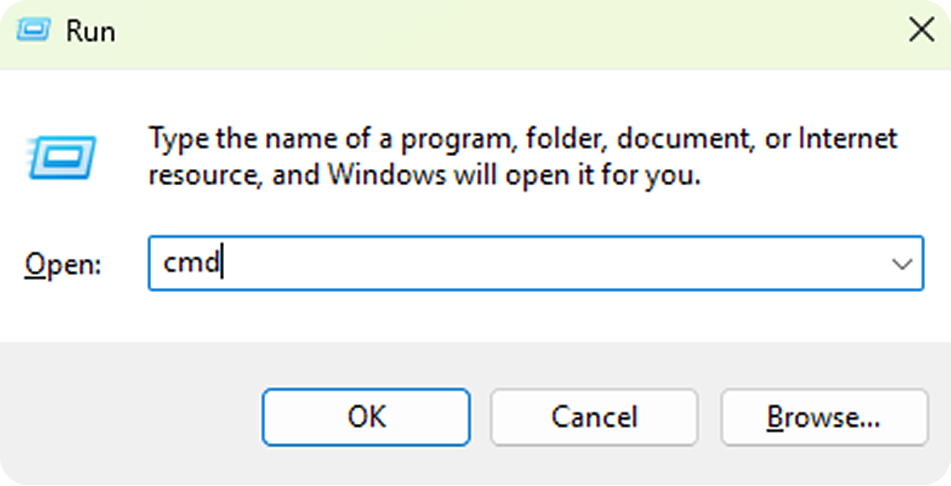
– Press Windows Key + R to open the Run dialog box.
– Type cmd and click OK.
– Alternatively, search for Command Prompt in the Start menu and select Run as Administrator.
2. Enter the Flush DNS Command
Type the following command into the Command Prompt window:
ipconfig /flushdns
Successfully flushed the DNS Resolver Cache.

3. Restart Your Browser and Applications Similar to macOS, restart any browser or application that was experiencing connectivity issues to see the changes in effect.
Pro Tip for PC Users
If you’re using custom DNS settings (such as those provided by Cloudflare or Google), you might need to verify they’re correctly configured in your network settings. Resetting your DNS may also reset those configurations to default.
Using Windows PowerShell (Alternative Method)
If you prefer PowerShell, commonly used by advanced users:
1. Open PowerShell as an Administrator.
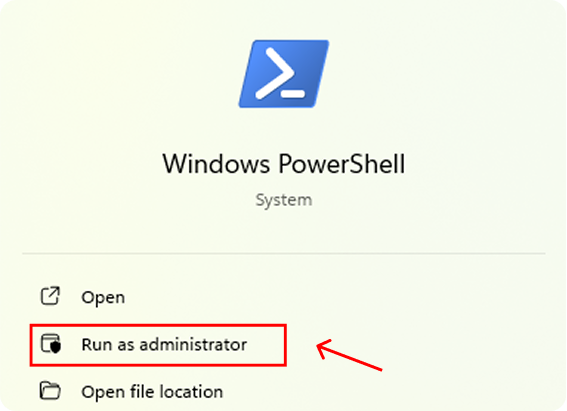
2. Run the same command:
Clear-DnsClientCache

3. Hit Enter. PowerShell will perform the DNS flush.
And that’s it—you’ve successfully flushed your DNS cache on Windows!
What to Do If Flushing DNS Doesn’t Work
Occasionally, flushing your DNS may not resolve the issue you’re experiencing. Here are some potential steps to troubleshoot this:
1. Restart Your Router
If the problem persists after flushing DNS, the issue might reside in your network router’s cache. Power off your router, wait 30 seconds, and power it back on.
2. Reset TCP/IP Settings
On Windows, you can reset other network settings to complement the DNS flush:
1. Open Command Prompt as Administrator.
2. Type the following commands one by one:
netsh int ip resetnetsh winsock reset
3. Restart your PC when prompted.
3. Switch to a Public DNS
Your current DNS provider might be unreliable or slow. Configure your system to use a trusted alternative, like:
– Google Public DNS – 8.8.8.8; 8.8.4.4
– Cloudflare DNS – 1.1.1.1; 1.0.0.1
– OpenDNS – 208.67.222.222; 208.67.220.220
4. Clear Your Browser Cache
DNS cache isn’t the only type of cache that can cause browsing issues. Clear your browser’s cache to ensure local data isn’t interfering with DNS resolutions.
5. Run a Malware Scan
Sometimes, DNS errors persist because malicious software is hijacking your connections. Use antivirus or anti-malware tools to scan and remove any threats.
6. Contact Your Internet Service Provider (ISP)
If none of the above solutions work, your ISP might be experiencing a broader DNS-related issue. Reach out to their customer support.
Signs the Issue Could Be DNS-Independent
– Websites load on one device but not another.
– Websites fail to load over Wi-Fi but work on mobile data.
These cases may indicate issues unrelated to DNS, like hardware malfunctions or browser-specific glitches.
Final Thoughts
Flushing your DNS cache is a powerful yet simple technique for resolving a variety of internet connectivity issues. It ensures your computer has up-to-date routing information, improving network performance and fixing common errors. Whether you’re using a Mac or a PC, the steps are manageable—even if you’re not a tech expert.
Remember, while flushing DNS often works wonders, it’s not always the final fix. Be prepared with additional troubleshooting steps like router resets, public DNS setups, or malware scans.
Stay in control of your browsing experience—your computer (and sanity) will thank you!
